Note: this option is available on all themes except for Premium responsive theme.
Custom Header is an image that is chosen as the representative image in the theme top header section. In order to custom the header image, click on the Header link, under Appearance menu:

Once the page opens you can edit the header image settings:
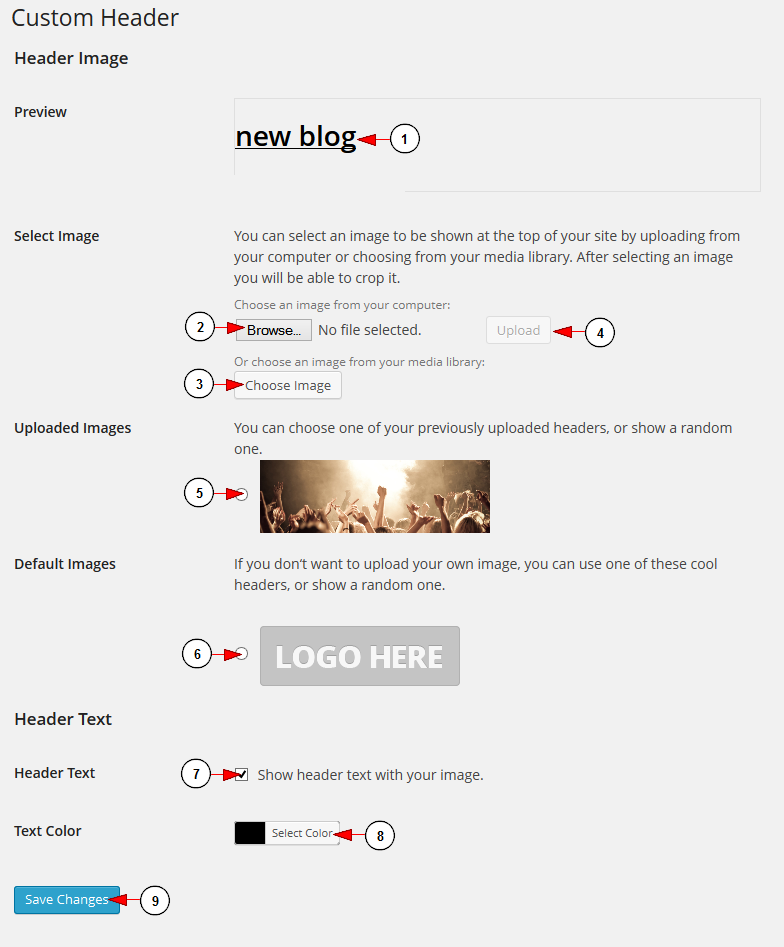
1. Here you can preview the header image you have uploaded.
2. Click here to browse a picture in our computer.
3. Click here to select an image from your Media Gallery.
4. Click here to upload the picture on your weblog.
Note: At the moment there are six themes which can have the header customized. The sizes of the header images for all six supported themes are:
- Simple One Theme: 800×120 pixels
- Simple WordPress Theme: 200×50 pixels
- City Theme: 960×146 pixels
- ROCK ON Responsive Theme: 200×100 pixels
- Florida: 1020 × 116 pixels
- Church responsive Theme: 1000 x 288 pixels
5. Check the radio button to select one of the pictures you have previously uploaded.
6. Check the radio button to select one of the default image headers, if you don’t want to use an image of your own.
7. Check the radio button if you want to display text on the header.
8. Click here to select a text color from the color picker. You can add a text color by inserting the code in the bar.
9. Click here to save the changes.
Before uploading a header image, please take into account our recommendations:
- reduce the file size of the header image to below 50k.
- convert image type to JPG instead of PNG.
- remove transparency.